BANKING ACCOUNT STATEMENT

Select the “Banking Account Statement” command or the graphical icon in the main toolbar.

This module has been prepared for susers who do not wish to work in the “Accounting Records”, which necessarily require skills and experience, but still intend to keep track of bank transactions and the corresponding balances. It is therefore necessary also to compare the values with what is represented by the bank statement sent periodically by the bank.

To make a bank as default, select it from your bank statement “Bank reference”.

4 main solutions

Software create a movement. In the T1 field choose the type (payment, withdrawal, bank receipt, check, movement, bank receipt rejected or bank transfer). Only after this preliminary phase do all the other fields become active.
“Headed to”, “Done by”, “Received from”: enter the Customer or Supplier, the date of insertion and any notes.

“Bank Receipts”
If in the T1 field “Bank Receipt” option has been selected, the program creates a manual bank receipt. In the T2 field choose “Normal” for creating bank receipts with only one invoice as the reference, otherwise “Cumulative” for more than one (with the same customer and expiration date).

Subsequently press then “Sale Invoice” or “Accompanying Invoice” or “Credit Note” bottom, then select the relevant document to be included as reference in the “Bank Receipt” with the same document date, expiration date and customer. If it is necessary to remove one of the inserted documents, press the bottom to delete the last one entered.

For each invoice entered, the total values are increased automatically; otherwise it happens for the customer credit notes where the totals are deducted instead.

If the selected invoices have multi-rate payments, once the selection phase has been completed, the “Calculate” button must be pressed: it cancels the current bank receipt and creates as many movements as the number of payment rates (installments), completing the totals and expiry dates of the new effects.

“Checks”
If in the T1 field it has been selected “Check” option, in the T2 field there are two options: “Issued” or “Entered” and it depends on if the check is issued or received. It is then necessary to insert the customer or supplier, the date of insertion and any notes, included the number in the “Movement No.” field.

“Movement”
If in the T1 field “Movement” option has been selected, in the T2 field there are two options: “Positive” or “Negative”, the chosen option defines the amount (if it is deposited or withdrawn). Then it is possible to insert the customer or supplier, the date of insertion and any notes.

“Bank Receipt Rejected”
The same considerations made for other bank transactions apply.
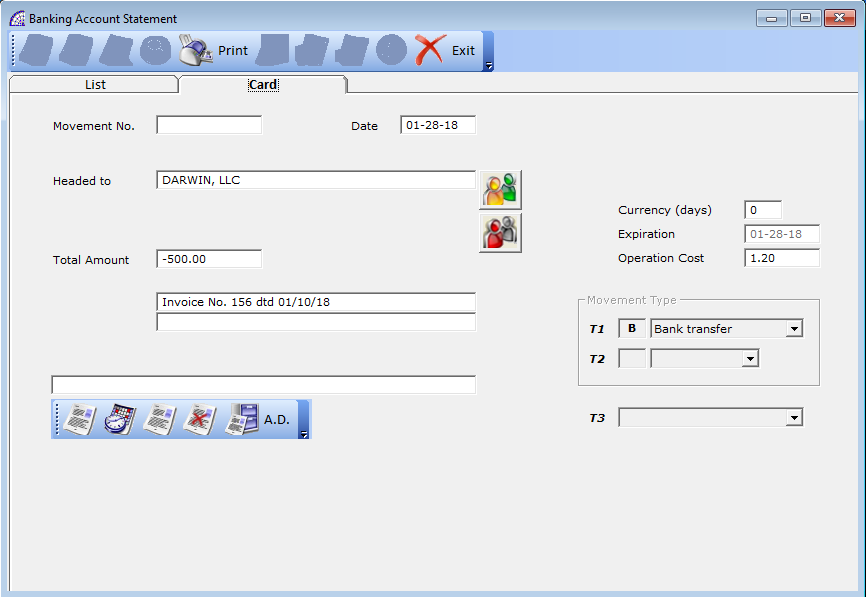
“Bank transfer”
You must enter the customer or supplier, the amount and the date of insertion and any notes. To print the bank transfer form, see the print icon described below.

For each banking movement during creation, a corresponding journal entry in the “Accounting Records” could be created.

To create this recording also in the “Accounting Records”; before returning to the “List” card and after inserting the data select the “Accounting Causal” in the T3 field and press the “A.D.” button in the “accounting toolbar”.

The list of “Accounting Causals” displayed in the T3 combo box correspond to the ones that have the “Ref. Bank” flag active (menu “Accounting” + “Accounting Causals”).

In the case of a “Bank Receipt” type movement, after selecting one or more invoices with multiple payment deadlines, the program displays a new button in the accounting toolbar: “Calculate”. This button is necessary to transform the bank receipt created into several transactions of the same type, one for each installment of the payment deadline.

The best solution for the accounting

deletes the selected movement.

Learning

deletes all movements from date to date.

The best solution for the accounting management

apply the search conditions.

Accounting software @/Arpro

reports the bank conditions of the selected bank.

Among the banking conditions we find interest rates, costs, and various, as well as the balance until the last operation performed for this bank; everything concerning the conditions agreed upon with the bank is inside of this window.

This information, besides being of an informative nature, is used automatically by the program during the registration of bank transactions to define expenses and fees due to the bank.

Easy accounting software

“Print preview”: create a list of all bank statement transactions for the bank selected.
“Request module”: Once the movement is generated (bank transfer, advance payment request, etc.), it is then possible to print. In the case of “Bank transfer” (selected from the T1 button), the personal and bank details of the customer/supplier are automatically reported.
“Movements for currency”: creates a list of all bank statement transactions divided by currency date.